

I’ve considered a lot of options for our first Sigao Studios blog post. And while there are many great options, I wanted to start with a series on creating a modern Web application using AngularJS and .NET Core. This guide will be designed for beginners and will walk through step by step a long journey to creating a complex application that uses plenty of cool technologies such as AzureAD, Docker and others.
Phase 1 – Start at the start
We will end Phase 1 with a fully configured development environment and workflow that will allow you to quickly develop your AngularJS Single Page Application (SPA).

So, as Lao Tzu once said, the journey of a thousand miles begins with one step. At the end of this, we will have configured Visual Studio 2015 to work with .NET Core and we will have created a blank .NET Core Solution.
These are entry level steps. If you are ready to get your feet wet, then go on to the next post where I will cover setting up tools such as Bower and Gulp and will get started with a good, core HTML framework that will be the basis of our next phase.
Configure Visual Studio

We will use .NET Core 1.0 to host our demo application. .NET Core is a cross platform development platform developed by Microsoft and members of the .NET Community. .NET Core allows you to be operating system agnostic. Code that you write to host an MVC page or cool new dashboard tool can run on Windows, Azure, Linux, or MacOS (among others). .NET Core gives you the power of the .NET framework with revolutionary portability. We will leverage that portability in this series. We start by running our code on a Windows box, but will eventually learn how to run it in Linux, both in and out of Docker.
For now, let’s get the development environment setup. I will be using Visual Studio 2015 Community Edition. If you don’t already have that, then get it. It’s free and is extremely powerful. Go to www.visualstudio.com and download Community 2015.
If you already have Visual Studio, be sure to follow Microsoft’s prerequisites guide located here.
Once you get Visual Studio 2015 installed, you will need to get .NET Core Tooling Preview 2 for Visual Studio 2015. The .NET Core Tooling gives you the project templates and tools needed to allow Visual Studio to create and maintain .NET Core projects.
Create a blank .NET Core Application

Now, before I start any project, I like to create a blank solution that will hold all of the projects I’m going to build. This allows me to get a clean folder structure to work with and is helpful in large, multi-project solutions.
Create the solution
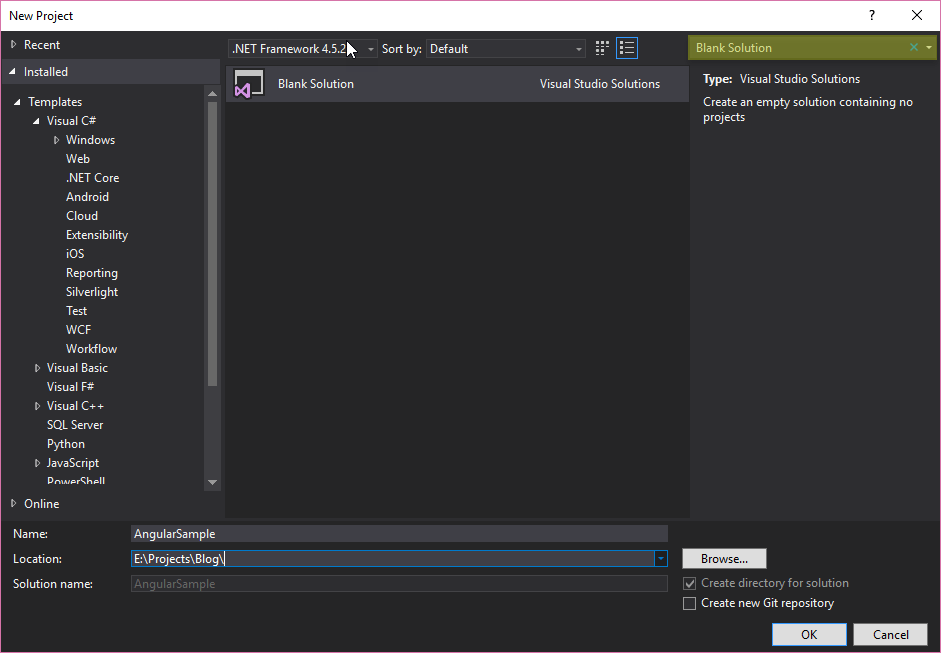
- Start Visual Studio 2015.
- Click File -> New -> Project.
- Search for “Blank Solution” using the search box in the top right of the dialog.
- Select Blank Solution.
- Give your solution a name. We will be using AngularSample.
- Ensure you have “Create directory for solution” selected.
- You can create a Git repository if you so chose, for now, we will skip that step.
- Click OK
Create the project
ASP.NET Core gives you several options of templates to work with. You can begin with an empty project, or elect to start with an MVC or WebAPI solution. Since we will be focusing on building client-side, Single Page Applications, we will start with a blank solution for now. Later on, we will explore other options, but I want to start with a blank slate and build out our modern web development tooling environment from the ground up.
Now that we have a blank solution to group all of our work into, let’s add our first project. We will call it AngularSample.Web to indicate that this is the web front end. In the future, we will add an API project, so this naming convention will help us organize our files.
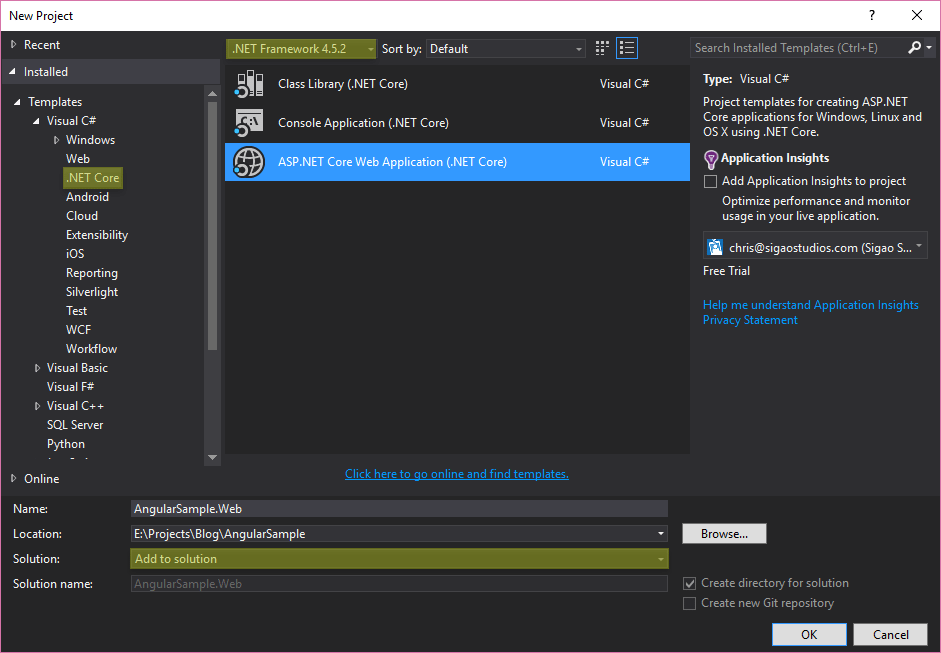
- Press Ctrl+Shift+N to create a new project, or File -> New -> Project.
- In the templates, expand Visual C# and select .NET Core.
- Select the ASP.NET Core Web Application (.NET Core) template.
- Give your project a name, we are using AngularSample.Web.
- Ensure “Add to solution” is chosen from the Solution drop down.
- For now, uncheck “Add Application Insights to project” later on we will likely explore Application Insights, but we will skip this for now.
- Click OK
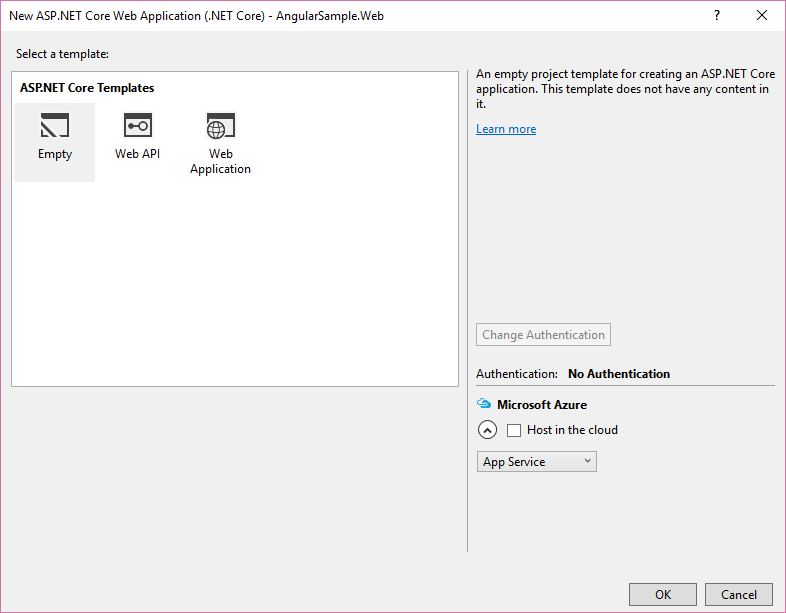
Finally, we will select the Empty template. In later posts, we will look at Web API and Web Application, but for now, we want a bare bones ASP.NET project.
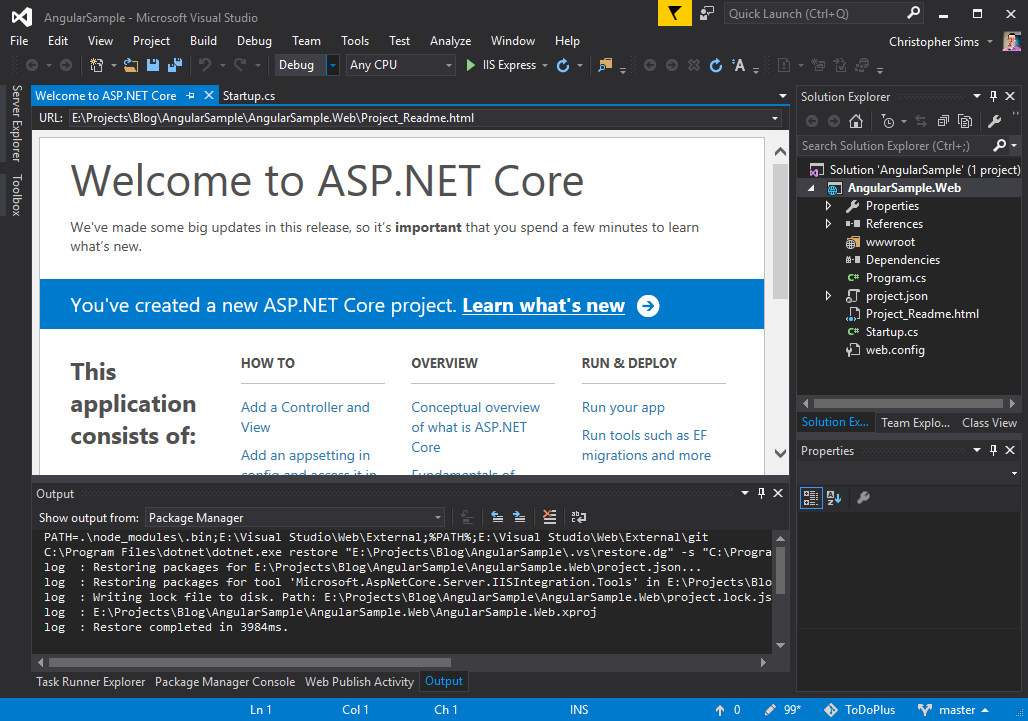
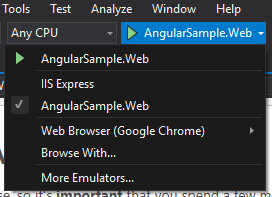
Now, we have a blank ASP.NET Core solution. We will run it using the .NET Core runtime. To do that, we must tell it to Debug using “AngularSample.Web”.
Finally, if we press F5 the solution will run in .NET Core as shown here.
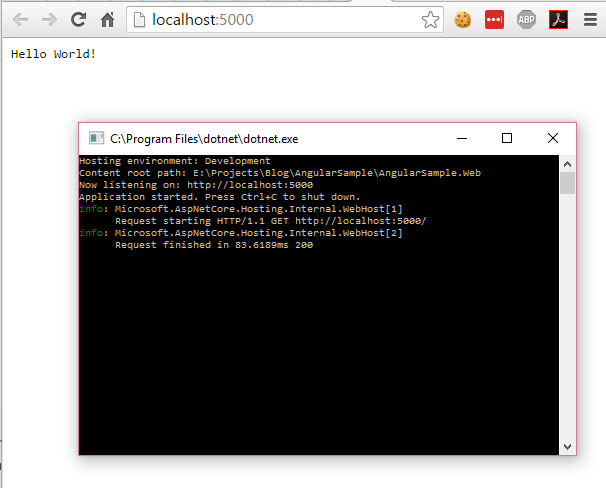
It’s not very impressive, but then again, we haven’t done that much. We have a base canvas to begin molding. In the next post, we will learn how to add NPM, Bower, Gulp, Grunt and JavaScript IntelliSense to the solution to leverage the power of modern Web development tooling. From there, we will get a base application setup and then, finally, get into doing some cool things with AngularJS.
[su_button url=”http://www.sigaostudios.com/2016/08/aspnet-core-and-angularjs-step-2/” style=”flat” icon=”icon: chevron-right”]Continue to the next post[/su_button]